Saucony Shadow Classic (Spray painted logo)

Posted: November 29, 2015 in Blog

After my last beater shoe gave out, I knew I had to get a pair of casual shoes that not only looked good but felt great as well.

I was initially leaning towards a pair of 574s by New Balance. I browsed online but available color ways were beyond my taste. I cant fathom why local distributors won’t stock basic black or grey, or black and grey!

So I went to SM Megamall hell bent on picking NBs. Checked out boutique shops but non had NBs in stock. Lo and behold, SM department store to the rescue. I was initially checking out NBs but when I chanced upon the Saucony Classic booth, there was no comparison. A couple of my friends casually recommended Saucony’s. I knew that Saucony is a premier running brand. What I was unaware of is that they also had street cred history.  In my humble opinion, Saucony Shadows which is comparable to 574s were of better fit, look, and most importantly craftsmanship. I was gladly confused with a myriad of color ways available, many fit my taste, but settled with basic black and white. It screams rock and roll.

Yup. I did spray paint the logos black. Also, did the back mesh with dark grey. Looks pure sex in my humble opinion. \m/

edit: I was sick and stayed home for three days. Well, the shoe became a victim of boredom and now is slowly turning all black. Cracks did show on the logo so had to spray over it again, this time adding flat clear for good measure.

Pyrography

I’ve recently discovered the art of Pyrography by browsing the web for creative things do. Specifically, I was looking for something anything that I could handcraft and give to my wife as a gift for Valentine’s Day. Cheesy, but women are so into those little things.

I came across Pyrography by researching how some custom built tube amplifiers were built with gorgeous faceplates employing hard wood and burnt brand names.  While researching the art, I was amazed to found out that there’s a whole universe dedicated to the art. A lot of dedicated websites about Pyrography are in abundance. Apparently, there’s a whole line of equipment and apparatus used to make Pyrography art. The prices of these things are beyond me. I only plan to do one offs, so as most of my DIY attempts I have to use whatever is currently at my disposal.

Pyrography 1

Meat Smoke amp by Verellen Amplification with burnt logo. Could have been either made by ‘branding’ or ‘pyrography’, whatever technique is used it looks awesome…

Pyrography 2

Dwarvenaut 20 tube amp by Hovercraft with beautiful pyrography work on the top of the head shell.

So I had to make use of my old and rusty but trusty 30w soldering iron. It’s one cheap Japanese brand that so far hasn’t let me down. So cheap that I haven’t even replaced the original tip that has been sanded to death to remove oxidation.

Pyrography 3

Takumi brand 30w run of the mill soldering iron.

There’s a ton of information out there on how to make Pyrography art. So much information in fact, that I decided to forego any established technique and just freehand the art and let my creative juices guide me. I concluded that the rawness of the outcome would have an endearing look and feel into it. Know that I am in no way good with art. But I try hard. Believe and you will achieve and pray that you don’t mess up along the way… That has been my mantra and forever will be. 😉

Pyrography 4

Initially had pencil outlines but decided to freehand it the rest of the way.

Obviously, this isn’t going to be an Instructable. Rather, I am sharing this to prove a point that you could use something decent or half decent with everyday items. One doesn’t have to be limited to whatever the mainstream sells you. Everyone has the creative pulse to make life of something you and your love ones can be proud off. You don’t need anyone’s opinion. What matters at the end of the day, is you satisfy that little artsy demon (or angel) inside of you and know that your creation will be appreciated by someone, at least to some extent.

Pyrography 5

Front and back pieces. Finished with glossy clear coat of acrylic spray paint.

Pyrography 6

Side detail.

How to lube bike chains with candle wax

wax 1

After a few of weeks of riding YBN halflinks, it snapped, as expected. Although I did not expect it to for at least a couple more months. That’s considering that I don’t ride hard at all. As I am determined to not get sucked back into spending a lot of moolah on yet another hobby, I had to make use of what I have. So I resurrected an abused KMC set I had lying around the bike parts bin. Rusty and old but the overall integrity seems intact.
I remember reading a few years back about using wax to lube chains. At that time, I didn’t really put much thought into it but now seems to be the perfect time.

Ingredients:
– Chain
– Pencil
– Light oil lubricant
– Stove/burner
– Candle wax

I know candle wax is not really the type of wax used for lubrication. That’s the reason I’ve added graphite and an oil based lube to the mixture. By theory, once the wax wears off, graphite and oil should stay. Well, at least I hope so. I estimate my formula to be 80% candle wax, 10% oil, and 10% graphite.

Gather the materials and make sure you’re in a well-ventilated location and wear ample protection (gloves and googles).

wax 3

Pre-heat the container. Put the wax in, add the other mixtures and dip your chain. There goes your shinny sticky newly lubed chain! Now ride your bike you silly monkeys.

wax 4

wax 2

Disclaimer: One important part of the process prior to dipping your chain is to make sure it’s clean. What I did was to first soak it on DOT 3 brake fluid inside a Ziploc bag for a few days. Clean afterwards with soap and water. Then remove excess water with cloth. I left it hanging outside to dry further.

Image  —  Posted: May 29, 2014 in Life Hacks
Tags: , , , , , , , , ,

Image


Front shot of restored Oakley Flak Jacket


So i had this beaten to death Oakley Flak Jacket lying around. Took me awhile to muster the effort needed in possibly restoring the sporty sun-glass. As they say, necessity is the mother of all inventions. The cliche became apparent when i had my physicals done at work. For twenty odd years, i had a perfect 20/20 super-saiyan vision. No need for geiger counters when sizing up would-be opponents.  Alas, father time had caught up and am now slightly blind. 

From where am at, prescription glasses are cheap. But am about to buy a car and wifey is only a couple a months away from giving birth to Goten. So i had to keep my priorities straight.. Light bulb moment.. Drum roll.. What about that old beaten up Oaks just gathering dust.. Does it take prescription lenses.. Quick google.. It does.. So… hmm… Let me take it to the infamous Quiapo-Raon pseudo-optemetrists to find out… But this thing looks garbage, literally, bin-ready.. ???

So took the thing to work and had it checked by a couple of Oakley elitists co-workers. Whad’dya think Brah’? I’m planning to take it to a shop and have new lenses fitted and hopefully re-done… Not worth your time. Buy new ones. Get a penny, x-metal-wateva, Jordan-coded-special issue this and that… Oh crap… Just hate when people burst my bubbles…  Not the type who takes no for answer. 

Good thing I chanced upon Oakleyforum.com. What a wealth of information and wisdom. Especially the peeps from the DIY/Mod section, big shout out to the brave and bold Oak masters. 


Image


Parts and pieces after taking a bath


So i wish i had a ‘before’ picture to show how gruesome the thing was prior to the restoration. It was totally un-useable then. The quick restoration I did was pretty spartan and for better understanding, outlined below in succession:

1. Stared at it. While visualizing how i’d deconstruct and reconstruct.

2. Took the piece off one by one. Starting with lenses, then the arms of the frame, and all rubber accessories.

3. Peeled off the right-side Oak logo for a future re-paint. The other side was already missing. 

4. Bathe the un-useable lenses in Denatured alcohol to peel off the protective layer. Which i believe is a first. So I take all credit for this innovation. lol

Image


Black iridium lenses bathe in denatured alcohol. 

5. Rinse said lenses in good ol’ soap and water. Let dry and be amazed.

Image


Once the problem layer goes off. The original base color of the lens will shimmer just like NEW. Well mine had scratches but totally un-noticeable when worn and when looking from the inside. 

6. Boil hot water. Put rest of the frame in a basin and pour boiling water. Let soak in a few seconds then start the arduous process of fingernailing.

 7. Use micro fiber to dry every bits and pieces. Gather and re-construct. 

8. Wear it with pride and go ahead and abuse it since it didn’t cost you a thing. 


Image


From the side. Blacked-out plain G. looks. 

Just visited Jim’ Wendler’s site today, www.jimwendler.com (duh!?), and once again got inspired by another one of his short and ass-kicking write-ups. If you have seen videos or read any of Jim’s works, you know that the guy has a penchant for striking the heart and soul of people with his no-BS attitude in training and in life Here’s another poignant quote by Mr. Wendler:

“The problem with the increase in assistance work is that everyone wants to have their cake and eat it  too. It doesn’t work like that – you can’t be strong like a powerlifter, fast as sprinter, and as big as a linebacker. Well, you can, but these people are so rare that teams pay them millions of dollars and television stations have billion dollar contracts to broadcast them to you. They’re called  professional football players, and if you’re one of them, you aren’t reading this, as you’re too busy counting your  money and cracking skulls.

So if you want to increase the volume of your assistance work, follow the plans above and use your head. Also, less typing – more training and eating.”

This statement definitely hits the ball out of park. Just yesterday, I ended my deadlift day kind of disappointed. I felt fresh and strong at the start of the session and thought of adding another 5kgs to my Power Clean. I start every leg strength session with the Power Clean with the dual purpose of improving my power output and to warm up for the actual main lift for the day, which is either the squat or the deadlift. I have never maxed out on a Clean lift so I always take the side of caution only lifting sub 70kgs. This day though was different and I tried to up the ante with a pitiful weight of 72kgs (158.4 lbs) for 5 sets of 2 reps, which is actually my new PR.

I completed the sets then proceeded with the main lift of the day, the deadlift. Being only the 5’s week, I know I can easily complete the required sets and I did. After deadlifting though, came the swift carnage of lactic build up on every part of my lower body. I was spent. I tried to complete the remaining accessory work but my energy level was below super-saiyan level. I was disappointed with my performance. I left the gym feeling as if I’ve got butt raped with nothing to show for but the pitiful PR on the Power Clean.  

The statement above definitely put things in perspective. In hindsight, I probably actually made a huge progress without skewing off of my goal overall strength gain. With that experience, I came away with a different plan of attack. I now need to thinker my lifting programming to compensate for the added assault of training 2x a week of MT. I came to the realization that no matter how I view myself, I am at a stage where I am no longer capable achieving elite world class level abilities. And If I have to improve on one aspect of my life, I have to taper off on another. Something’s gotta give.

Thanks Jim for the training lesson and another life-check.

pic3pic2

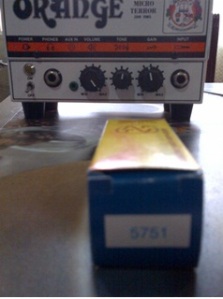
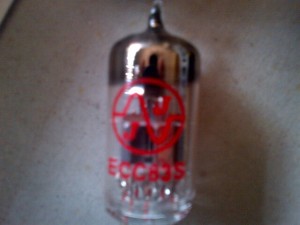
I recently purchased JJ’s iteration of the 5751 pre-amp tube. I have been using the stock JJ EC883 tube on my Micro Terror for the past year and thought a replacement, or at least a backup that I can experiment with, wouldn’t hurt.

I specifically chose the 5751 tube based on the description I found on Eurotubes.com.

The JJ 5751 has all of the qualities we have come to expect from JJ Electronic, a nice tight low end, a natural open mid, a great harmonic structure and a sweet high end that is not brittle. This is a great tube for V1 if you’re trying to drop the gain a little and improve headroom. You can also use a balanced version of this tube as a phase inverter to further increase headroom in amps that incorporate a long tail phase inverter circuit and usually use a 12AX7 or ECC83.

I liked how it was described and I would say that they are right on 100% with the description. Now, the main reason I selected this tube was to somewhat improve the amps’ gain tone. If you’ve played through a Micro Terror before, you’d know that coaxing any high gain setting with the volume cranked would sound really muddy and un-refined. JJ’s 5751 was the perfect cure. It instantly took away the unbearable mud you’d usually hear with gain knob past 3 o’clock and volume cranked. This tube is definitely a keeper. I have now shelved the stock EC833s.

Clean. My Lace Hemi humbuckers are described as having sparkly, bell-like tones. For a while, I’ve never really paid much attention to this as I am down tuned to C# standard 100% of the time. I really don’t expect to hear Fender-esque tones, nor have the desire to. The very first tune I played after plugging into the Terror with the replacement 5751 tube was APC’s The Stranger, one my favorites off their 2nd album. With the tone knob on my guitar rolled off to about 3-4, I was really amazed to hear an acoustic like tone with a really sweet high end yet still retaining that woody mid sound which I really like. Far from a Fender type clean, but a clean sound that I really like. Detuned, acoustic-like, with bell like top end that is strong and refined.

Distortion. I made a few adjustments on the rest of my rig to compensate for the change in the Micro Terror’s tone after changing into the 5751. The verdict is still in progress, but I do love my distortion sound on the stock EC833s. If plugged in direct, the 5751s gain is no question better than the ec833s as it retained clarity even with the amps gain knob past 3 o’clock and volume cranked. The predicament is with balancing and eq’ing the rest of my pedalboard in, which is something I still have to experiment with.

Settings: Amp volume cranked, tone at 1 o’clock, gain at 11 o’clock if using pedalboard distortion/OD. Gain at almost 3 o’clock when plugged in direct.

Verdict. Definitely a keeper. I would reckon that the JJ’s 5751 would sound good with any amp from Orange’s Terror series. I also think it would sound good in any V1 position of an all-tube amp. If you’re looking to tame the gain stage of your amp without losing volume, then this is for you. I play mostly classic riffigin’ and modern sludge, doom, stoner tunes and the tone I get from the 5751 suits me fine. Now, I need to secure funds to try out some JAN 5751s. 

IMG-20140103-00187IMG-20140103-00183<a

My brother and I recently bought a heavy bag and next on my radar was of course a pair of boxing and Muay Thai gloves to protect my hands. For years, I have relied on just using a pair of boxing wraps for heavy bag work. On occasions, I would borrow my bros’ Twins Special 12oz BGVL3 gloves and liked how it felt. Hence, my decision to go with the same size and brand. Besides, locally, Twins Special is the go-to brand for both boxing and Muay Thai users for its durability and value. Every gym I’ve gone to uses the brand for all striking related implements: pads, heavy bag, speed ball, gloves you name it.

Here’s my initial review:

Info. The glove I have is the Twins Special Velcro wrist strap version. Primarily, a Muay Thai training glove but is also being used for boxing and other forms of fighting arts. It was manufactured circa 2013 and of course was made in Thailand. It is made out of genuine cowhide leather painted in green camo. Model number is FBGV-FG-12.  I bought the pair from Philippines’s Twins Special exclusive distributor, www.K1extreme.com.

Look. I personally made my way to K1 extreme’s shop located near Greenhills, QC. It isn’t hard to find as amidst the signages littered along the street, you’ll spot that theirs’ stand out with a bold red letter and number combination: K-1. Being the exclusive distributor of the brand, they have an impressive rack of Twins Special gloves of different sizes, color ways and designs.  I remember seeing some Fairtex, Kings, and also a Venum glove as well.

While visually inspecting the Twins Special rack, 1 pair instantly jumped out of the pack and made an impression. The 12oz Camo designed Velcro version of the infamous TS Muay Thai glove. I have a fixation for anything camo. For me, the pattern just screams sexy and overall total badass look. I’ve been warned before to pick basics over form. But hell, I can’t resist this camo-ed beast looking straight back at me. The pocket got hit with 2,800php. A real steal considering TS designed gloves, especially uncommon ones, sell over 90$ in the states.

My pair scratched easily and the camo design chipped on different outer parts of the glove.  This happened on the very first heavy bag session I had with it. Not a big deal since the leather itself is intact and unscathed.

Training. I have and will be using these gloves for fight-related training. For heavy bag, mitt work, shadow box, sparring and everything in between.

Feel. I have now spent several weeks using the new pair. I have to admit that it doesn’t feel as comfortable compared to a 2008 TS pair I’ve used before. The internal hand compartment felt too compressed. The hook grip, I feel, adds to weird feeling that is neither comfortable nor uncomfortable. Just plain awkward. The awkward feel is a small price to pay though for the serious padding and overall quality of the gloves construction. That attention to detail: Thai handmade, heavy and thick padding, reinforced stitching, cowhide leather, quality and durable craftsmanship is the selling point of this fine product.

Recommendation. I highly recommend these gloves and any pair made and sold my Twins. I always find myself preaching about and recommending these to friends to anyone who bothers to ask. Just an FYI, tall and people with really longish fingers might run into sizing issues. I have medium hands and the tips of my fingers are almost touching the padding. My pink also felt a little too compressed for comfort, but I guess this will improve once I have properly broken-in the pair. A 9/10 rating for me only because nothings perfect.

Image  —  Posted: January 9, 2014 in Blog

For 2014, I plan to incorporate boxing and Muay Thai to my regimen to mainly improve on speed, balance and conditioning. Doing years and years of heavy lifting does take its toll. I feel like the extra poundage I have gained through the years made me sloppy, uncoordinated and unbalanced. I’ve been into martial arts since attending Wushu classes in my early teens. And through the years, I have sporadically picked up different forms of fight arts, albeit informally, from many people I came across. The last several years though, I had committed myself to the iron game and had set aside any form of fight training. Now, I have a renewed sense of improving all aspects of my physical well-being. My goal this year is to turn my body into a human wrecking ball. J

HACK OF THE DAY

Cleaning the preamp tube pins of an Orange Micro Terror amp head

IMG-20131217-00120

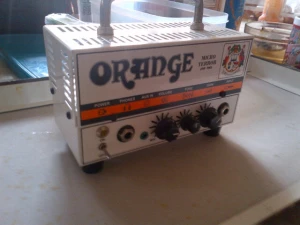
El Mikro El Terrible El Mickro Terorista

I was browsing thru the archives of Eurotubes.com with the intent of replacing the preamp tube of my Orange Micro Terror. The sound I am going for is really geared towards, dirt, grit, mud, more mud and then some fuzz. But recently, I’ve noticed that my sound muddied up by a few more notches moving towards unlike-ability, hence, my desire to experiment with other tubes. I was initially looking at a reissue of the Tung Sol 12AX7 because of rave reviews of it on forums, but I left my choice open for other JJ variants knowing how durable they are. Eurotubes peeps are known to be big JJ tube geeks, so they know their JJ tubes more than any other seller in the market, I reckon.

The JJ 5751 wound up to be the likely replacement candidate. I like what the description make it sound to be. It sounded to be just the right ticket for me to reduce gain and increase the amps head room. I am sold on JJ’s 5751 variant and actually bought one the same day when I saw that my trusted online supplier has it on stock. More on the JJ 5751 as I intent to publish a separate article about it in due time. 

IMG-20131217-00123

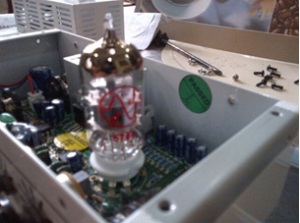
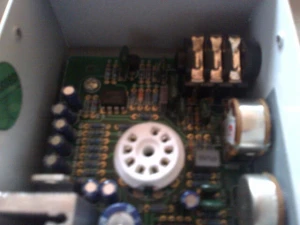
Gut shot of PCB and the socket of the pre-amp tube

After I made the tube purchase (along with more goodies), I resumed browsing thru the Eurotubes article archives. One article that struck me is about the fact that the majority of tube related issues can be attributed to dirty preamp tube pins. Like most metal, the preamp pins oxidize over time. Rust on the pins has been found to be one of the main reasons why tubes may go bad and loose its tone. The article makes a point about how a simple tube pin cleanup will make the tubes spring back to life.

That sounded an easy enough hack for me.

This would be my first attempt at working with an amp tube. The brute in me second-guessed whether or not my flimsy fingers would break the seemingly fragile tube. I later found out though that the tube is sturdy enough to be wiggled-free from the PCB socket. Just make sure to rock it back and forth gently enough not to bend the pins past a few degrees. Also, don’t press it hard when putting it back or you migh crack the PCB board.

IMG-20131217-00125

Stock pre-amp tube of the Micro Terror. A JJ 12AX7 EC883S

I used a q-tip, dipped in denatured alcohol, to clean the pins and socket of the PCB. I also used tissue napkin to clean dust and sludge. Being my first tube removal experience, I was overly cautious not to bend the pins of the tube. I made sure to use the same tissue to handle the tube as i’ve read that skin oil actually contributes to lessening the life of an amp tube. I re-assembled everything back. Plugged the Micro Terror to the speaker cab, and my LTD ec-50 to the amp, un oh! The amp sings again! A stark contrast to the lifeless sound it had before. I noticed that there’s a touch more clarity and the sound is now more refined. Definitely, mud and fizz drastically lessened. Cleans sounds more ‘sterile’, but in a good way. All in all, I highly recommend this simple mod, actually, more of a tube amp (okay, I know my amp is only a hybrid, but it has a tube so it counts!) maintenance thing more than anything else. For practically free, I suggest cleaning your own preamp tubes as frequent as a couple of months or even just once a year. This simple hack would definitely improve any guitarist tone.

Salamat!

– Jay

Greetings fellow earthlings!

Posted: October 10, 2012 in Blog

This blog is dedicated to my personal quest of achienving super saiyan-quesue mode of living! No, I don’t think I can turn my hair yellow and grow muscles at a pinch. What I do believe is that, like every sentient human being, I am capable of achieivng the greatest version of me. Be it in training, fatherhood, family, finance, and thriving in this constantly evolving plate of madness that we call life!