Archive for the ‘Life Hacks’ Category

How to lube bike chains with candle wax

wax 1

After a few of weeks of riding YBN halflinks, it snapped, as expected. Although I did not expect it to for at least a couple more months. That’s considering that I don’t ride hard at all. As I am determined to not get sucked back into spending a lot of moolah on yet another hobby, I had to make use of what I have. So I resurrected an abused KMC set I had lying around the bike parts bin. Rusty and old but the overall integrity seems intact.
I remember reading a few years back about using wax to lube chains. At that time, I didn’t really put much thought into it but now seems to be the perfect time.

Ingredients:
– Chain
– Pencil
– Light oil lubricant
– Stove/burner
– Candle wax

I know candle wax is not really the type of wax used for lubrication. That’s the reason I’ve added graphite and an oil based lube to the mixture. By theory, once the wax wears off, graphite and oil should stay. Well, at least I hope so. I estimate my formula to be 80% candle wax, 10% oil, and 10% graphite.

Gather the materials and make sure you’re in a well-ventilated location and wear ample protection (gloves and googles).

wax 3

Pre-heat the container. Put the wax in, add the other mixtures and dip your chain. There goes your shinny sticky newly lubed chain! Now ride your bike you silly monkeys.

wax 4

wax 2

Disclaimer: One important part of the process prior to dipping your chain is to make sure it’s clean. What I did was to first soak it on DOT 3 brake fluid inside a Ziploc bag for a few days. Clean afterwards with soap and water. Then remove excess water with cloth. I left it hanging outside to dry further.

Image


Front shot of restored Oakley Flak Jacket


So i had this beaten to death Oakley Flak Jacket lying around. Took me awhile to muster the effort needed in possibly restoring the sporty sun-glass. As they say, necessity is the mother of all inventions. The cliche became apparent when i had my physicals done at work. For twenty odd years, i had a perfect 20/20 super-saiyan vision. No need for geiger counters when sizing up would-be opponents.  Alas, father time had caught up and am now slightly blind. 

From where am at, prescription glasses are cheap. But am about to buy a car and wifey is only a couple a months away from giving birth to Goten. So i had to keep my priorities straight.. Light bulb moment.. Drum roll.. What about that old beaten up Oaks just gathering dust.. Does it take prescription lenses.. Quick google.. It does.. So… hmm… Let me take it to the infamous Quiapo-Raon pseudo-optemetrists to find out… But this thing looks garbage, literally, bin-ready.. ???

So took the thing to work and had it checked by a couple of Oakley elitists co-workers. Whad’dya think Brah’? I’m planning to take it to a shop and have new lenses fitted and hopefully re-done… Not worth your time. Buy new ones. Get a penny, x-metal-wateva, Jordan-coded-special issue this and that… Oh crap… Just hate when people burst my bubbles…  Not the type who takes no for answer. 

Good thing I chanced upon Oakleyforum.com. What a wealth of information and wisdom. Especially the peeps from the DIY/Mod section, big shout out to the brave and bold Oak masters. 


Image


Parts and pieces after taking a bath


So i wish i had a ‘before’ picture to show how gruesome the thing was prior to the restoration. It was totally un-useable then. The quick restoration I did was pretty spartan and for better understanding, outlined below in succession:

1. Stared at it. While visualizing how i’d deconstruct and reconstruct.

2. Took the piece off one by one. Starting with lenses, then the arms of the frame, and all rubber accessories.

3. Peeled off the right-side Oak logo for a future re-paint. The other side was already missing. 

4. Bathe the un-useable lenses in Denatured alcohol to peel off the protective layer. Which i believe is a first. So I take all credit for this innovation. lol

Image


Black iridium lenses bathe in denatured alcohol. 

5. Rinse said lenses in good ol’ soap and water. Let dry and be amazed.

Image


Once the problem layer goes off. The original base color of the lens will shimmer just like NEW. Well mine had scratches but totally un-noticeable when worn and when looking from the inside. 

6. Boil hot water. Put rest of the frame in a basin and pour boiling water. Let soak in a few seconds then start the arduous process of fingernailing.

 7. Use micro fiber to dry every bits and pieces. Gather and re-construct. 

8. Wear it with pride and go ahead and abuse it since it didn’t cost you a thing. 


Image


From the side. Blacked-out plain G. looks. 

pic3pic2

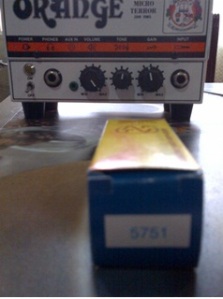
I recently purchased JJ’s iteration of the 5751 pre-amp tube. I have been using the stock JJ EC883 tube on my Micro Terror for the past year and thought a replacement, or at least a backup that I can experiment with, wouldn’t hurt.

I specifically chose the 5751 tube based on the description I found on Eurotubes.com.

The JJ 5751 has all of the qualities we have come to expect from JJ Electronic, a nice tight low end, a natural open mid, a great harmonic structure and a sweet high end that is not brittle. This is a great tube for V1 if you’re trying to drop the gain a little and improve headroom. You can also use a balanced version of this tube as a phase inverter to further increase headroom in amps that incorporate a long tail phase inverter circuit and usually use a 12AX7 or ECC83.

I liked how it was described and I would say that they are right on 100% with the description. Now, the main reason I selected this tube was to somewhat improve the amps’ gain tone. If you’ve played through a Micro Terror before, you’d know that coaxing any high gain setting with the volume cranked would sound really muddy and un-refined. JJ’s 5751 was the perfect cure. It instantly took away the unbearable mud you’d usually hear with gain knob past 3 o’clock and volume cranked. This tube is definitely a keeper. I have now shelved the stock EC833s.

Clean. My Lace Hemi humbuckers are described as having sparkly, bell-like tones. For a while, I’ve never really paid much attention to this as I am down tuned to C# standard 100% of the time. I really don’t expect to hear Fender-esque tones, nor have the desire to. The very first tune I played after plugging into the Terror with the replacement 5751 tube was APC’s The Stranger, one my favorites off their 2nd album. With the tone knob on my guitar rolled off to about 3-4, I was really amazed to hear an acoustic like tone with a really sweet high end yet still retaining that woody mid sound which I really like. Far from a Fender type clean, but a clean sound that I really like. Detuned, acoustic-like, with bell like top end that is strong and refined.

Distortion. I made a few adjustments on the rest of my rig to compensate for the change in the Micro Terror’s tone after changing into the 5751. The verdict is still in progress, but I do love my distortion sound on the stock EC833s. If plugged in direct, the 5751s gain is no question better than the ec833s as it retained clarity even with the amps gain knob past 3 o’clock and volume cranked. The predicament is with balancing and eq’ing the rest of my pedalboard in, which is something I still have to experiment with.

Settings: Amp volume cranked, tone at 1 o’clock, gain at 11 o’clock if using pedalboard distortion/OD. Gain at almost 3 o’clock when plugged in direct.

Verdict. Definitely a keeper. I would reckon that the JJ’s 5751 would sound good with any amp from Orange’s Terror series. I also think it would sound good in any V1 position of an all-tube amp. If you’re looking to tame the gain stage of your amp without losing volume, then this is for you. I play mostly classic riffigin’ and modern sludge, doom, stoner tunes and the tone I get from the 5751 suits me fine. Now, I need to secure funds to try out some JAN 5751s. 

HACK OF THE DAY

Cleaning the preamp tube pins of an Orange Micro Terror amp head

IMG-20131217-00120

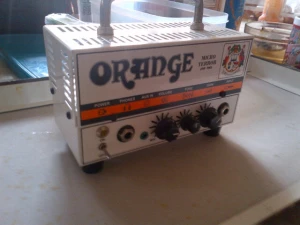
El Mikro El Terrible El Mickro Terorista

I was browsing thru the archives of Eurotubes.com with the intent of replacing the preamp tube of my Orange Micro Terror. The sound I am going for is really geared towards, dirt, grit, mud, more mud and then some fuzz. But recently, I’ve noticed that my sound muddied up by a few more notches moving towards unlike-ability, hence, my desire to experiment with other tubes. I was initially looking at a reissue of the Tung Sol 12AX7 because of rave reviews of it on forums, but I left my choice open for other JJ variants knowing how durable they are. Eurotubes peeps are known to be big JJ tube geeks, so they know their JJ tubes more than any other seller in the market, I reckon.

The JJ 5751 wound up to be the likely replacement candidate. I like what the description make it sound to be. It sounded to be just the right ticket for me to reduce gain and increase the amps head room. I am sold on JJ’s 5751 variant and actually bought one the same day when I saw that my trusted online supplier has it on stock. More on the JJ 5751 as I intent to publish a separate article about it in due time. 

IMG-20131217-00123

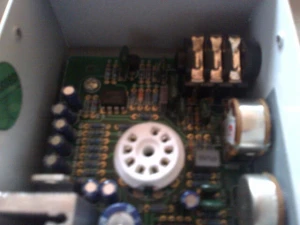
Gut shot of PCB and the socket of the pre-amp tube

After I made the tube purchase (along with more goodies), I resumed browsing thru the Eurotubes article archives. One article that struck me is about the fact that the majority of tube related issues can be attributed to dirty preamp tube pins. Like most metal, the preamp pins oxidize over time. Rust on the pins has been found to be one of the main reasons why tubes may go bad and loose its tone. The article makes a point about how a simple tube pin cleanup will make the tubes spring back to life.

That sounded an easy enough hack for me.

This would be my first attempt at working with an amp tube. The brute in me second-guessed whether or not my flimsy fingers would break the seemingly fragile tube. I later found out though that the tube is sturdy enough to be wiggled-free from the PCB socket. Just make sure to rock it back and forth gently enough not to bend the pins past a few degrees. Also, don’t press it hard when putting it back or you migh crack the PCB board.

IMG-20131217-00125

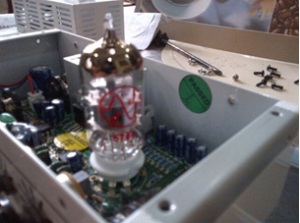
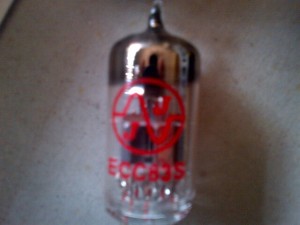
Stock pre-amp tube of the Micro Terror. A JJ 12AX7 EC883S

I used a q-tip, dipped in denatured alcohol, to clean the pins and socket of the PCB. I also used tissue napkin to clean dust and sludge. Being my first tube removal experience, I was overly cautious not to bend the pins of the tube. I made sure to use the same tissue to handle the tube as i’ve read that skin oil actually contributes to lessening the life of an amp tube. I re-assembled everything back. Plugged the Micro Terror to the speaker cab, and my LTD ec-50 to the amp, un oh! The amp sings again! A stark contrast to the lifeless sound it had before. I noticed that there’s a touch more clarity and the sound is now more refined. Definitely, mud and fizz drastically lessened. Cleans sounds more ‘sterile’, but in a good way. All in all, I highly recommend this simple mod, actually, more of a tube amp (okay, I know my amp is only a hybrid, but it has a tube so it counts!) maintenance thing more than anything else. For practically free, I suggest cleaning your own preamp tubes as frequent as a couple of months or even just once a year. This simple hack would definitely improve any guitarist tone.

Salamat!

– Jay